

Google 서비스 등록
https://console.cloud.google.com/getting-started
Google Cloud console
console.cloud.google.com
1.새 프로젝트 생성
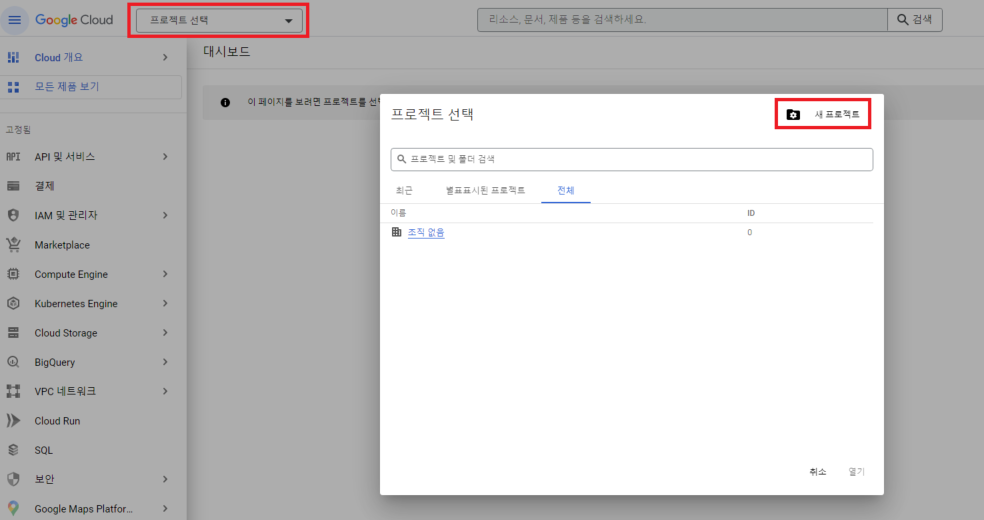

2.생성한 프로젝트 선택

사이드에 있는 네비게이션 바에서 아래 이미지 처럼 클릭

3.사용자 인증 정보 -> OAuth 클라이언트 ID

만약 OAuth 동의를 하지 않은 상태면 아래 버튼을 클릭하여 OAuth 동의를해준다.

OAuth 동의를 했다면 3-2) 단계로 넘어가자.
3-1)OAuth 동의
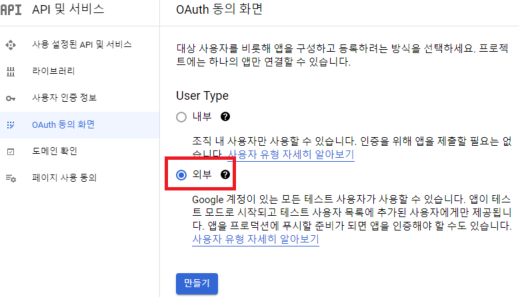
채울 수 있는 부분을 채워준 후 [2:범위] 단계로 넘어간다.

사용자의 정보를 어느 범위까지 액세스할 수 있는지 결정하는 곳이다.
테스트할 사용자의 메일을 입력해준다.

3-2) OAuth 클라이언트 ID 만들기
유형에 맞게 선택

승인된 리다렉션 URI
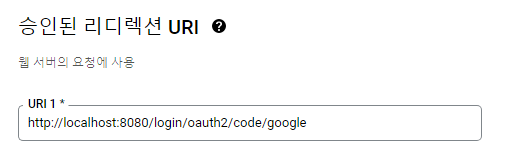
- 인증이 성공하면 구글에서 리다이렉트할 URL이다.
- 기본적으로 {도메인}/login/oauth2/code/{소셜서비스코드}로 리다이렉트 URL을 지원한다.
클라이언트 ID와 비밀빈호를 따로 저장해둔다.

4. 구글 설정 코드 작성
build.gradle 라이브러리 추가
implementation 'org.springframework.boot:spring-boot-starter-oauth2-client'
application-google.properties 파일 생성

spring.security.oauth2.client.registration.google.client-id=클라이언트 ID
spring.security.oauth2.client.registration.google.client-secret=클라이언트 비밀번호
spring.security.oauth2.client.registration.google.scope=email
git에 올리게 된다면 보안이 취약해질 수 있으므로 해당 파일을 .gitignore에 등록하는 것을 잊지 말자
application.properties 설정 추가
application.properties에서 application-google.properties를 포함하도록 코드를 추가한다.
spring.profiles.include=google
SecurityConfig 클래스
@Configuration
@Log4j2
public class SecurityConfig {

    @Bean
    PasswordEncoder passwordEncoder(){
        return new BCryptPasswordEncoder();
    }

    @Bean
    public SecurityFilterChain filterChain(HttpSecurity http) throws Exception {

        http.authorizeHttpRequests((auth) -> {
            auth.antMatchers("/sample/all").permitAll();
            auth.antMatchers("/sample/member").hasRole("USER");
        });

        http.formLogin();
        http.csrf().disable();
        http.logout();

        http.oauth2Login();

        return http.build();
    }

}
결과


OAuth2UserService클래스를 생성하여 구글 서비스에서 고르인 처리가 끝난 결과를 가져와야하는 작업을 해주어야 하는데 이는 다음 포스팅에서 하도록 하겠다.